When migrating a client from QuickBooks Online to Propio, two files are essential: the Account Listing and the Journal Report. The Account Listing gives Propio the complete Chart of Accounts structure; the Journal Report carries every transaction ever posted in the client's books. Together, they allow Propio to rebuild the client's accounting history with full accuracy from day one.
Before You Start
- You need admin access to the client's QuickBooks Online company.
- You will export both files as
.csv. Make sure you have a folder ready to save them — you'll upload both to Propio after. - These steps apply to QuickBooks Online (QBO). QuickBooks Desktop exports follow a different path.
Steps
Part 1: Export the Account Listing
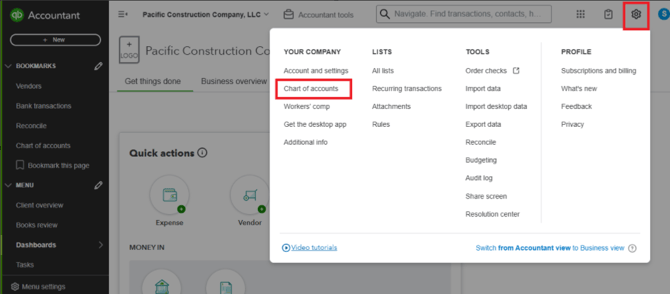
- Go to Settings → Chart of Accounts
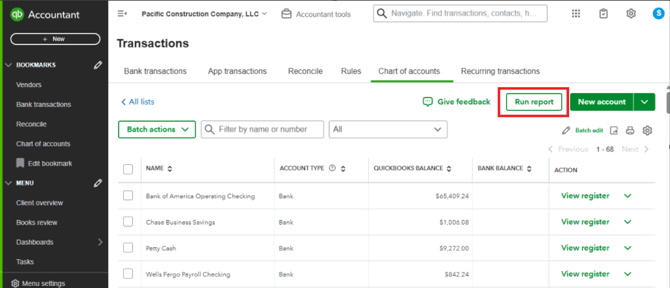
- Click Run Report
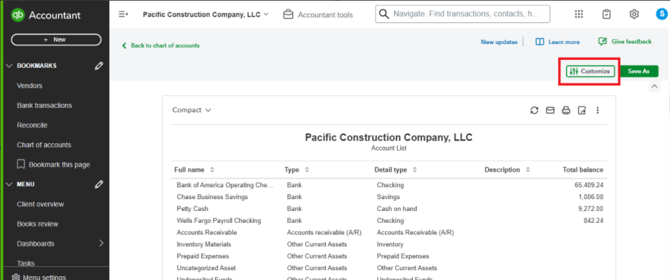
- Click Customize
- Go to the Filter section and click Clear All
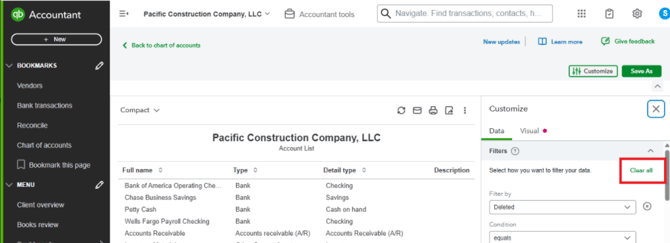
Why this matters: QuickBooks Online applies default filters that can hide inactive or less-used accounts. If you export with those filters active, Propio will only see a partial Chart of Accounts — missing accounts will need to be added manually later. Clearing all filters ensures every account is included.
- In the Rows/Columns section, make sure every column is checked so nothing is left out of the export
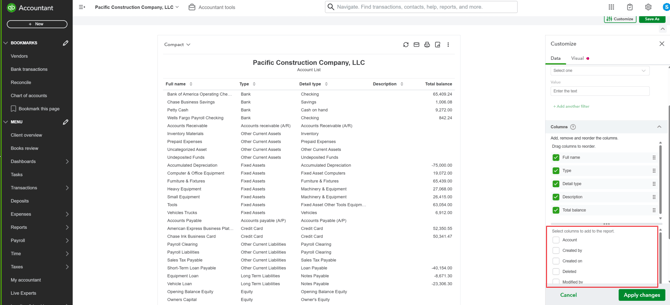
- Click Apply Changes
- Click Export and choose Export to CSV
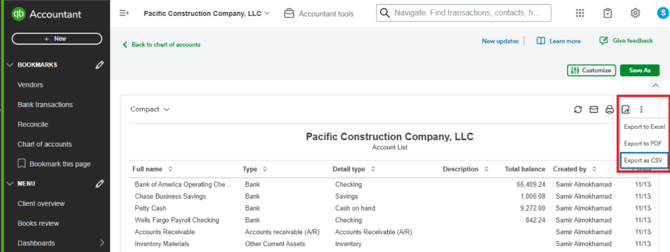
- Save the file to your migration folder
Part 2: Export the Journal Report
- Pre-export validation: Go to Settings → Account and Settings → Advanced → Chart of Accounts and make sure Account Numbers are turned off. Wait a moment for the change to take effect before continuing.
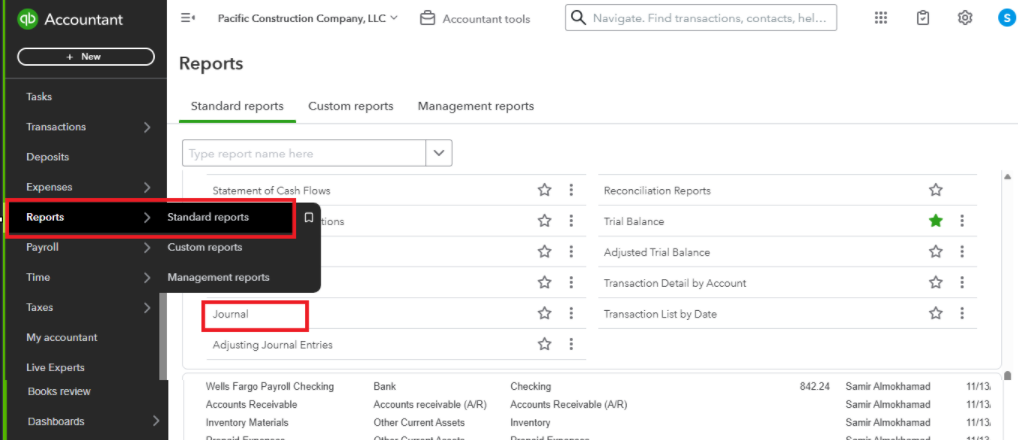
- Go to Reports → Standard Reports and search for Journal
- Set the date range to All

Why this matters: QuickBooks Online defaults to the current fiscal year. If you export with that setting, Propio only receives a partial transaction history. Selecting All captures every posted transaction from the beginning of the client's books — this is the complete historical record Propio needs to open balances and reports correctly.
- Click the Export icon and choose Export to CSV
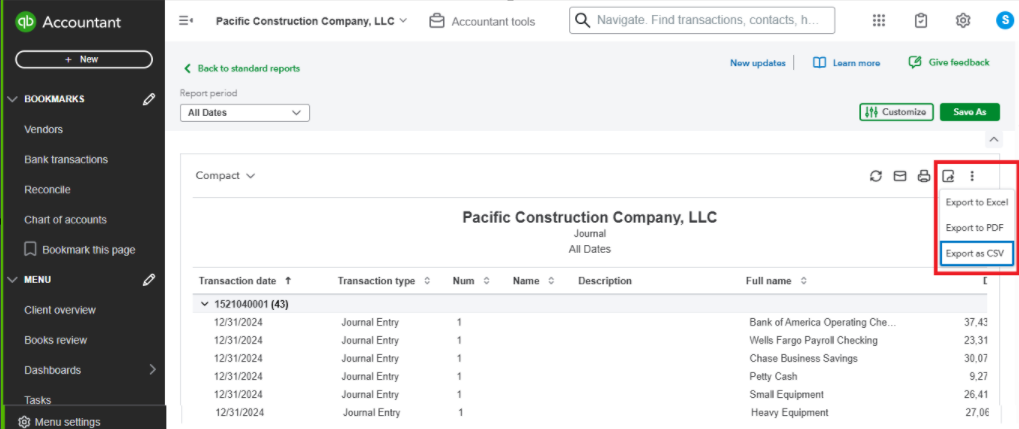
- Save the file to your migration folder
Tips 💡
- Removing filters is the most important step. Whether it's the Account Listing filters or the Journal date range, the goal is the same: leave nothing out. A restaurant group client, for example, may have old location-specific accounts that are inactive but still carry historical balances — those must be in the listing for reports to tie out correctly.
- Large transaction histories may need more than one file. If the client has several years of history with over 13,000 transactions, QuickBooks Online may struggle to export the full Journal Report in a single file, or the export may time out or come back incomplete. If that happens, export the Journal Report in date-range segments instead (for example, by 2-3 years) and upload all the resulting CSV files to Propio together.
- Save both files together. Name them clearly (e.g.,
ClientName_AccountListing.csvandClientName_Journal.csv, orClientName_Journal_2023.csv,ClientName_Journal_2024.csvif split) and keep them in the same folder for upload.
Related Articles
- Export Account Listing and Journal Report from QuickBooks Desktop
- Migrate and Map your Chart of Accounts from QuickBooks Online and Xero
- Create and Set Up a New Client