
When you migrate a client from another system such as QuickBooks or Xero, as part of one of the final stages of the migration process, Propio walks you through a three-step process — Configure, Customize, and Map — that turns their legacy Chart of Accounts into a lean, tax-basis Chart of Accounts. The first two steps set up the account structure itself; the last step, Map, is where you connect each legacy account to Propio account. How precisely (or loosely) you map here determines both the accuracy of AI Categorization going forward and how easy this client's books are to run.
Step 1: Configure — Select Account Groups
On Help us tailor your chart of accounts, toggle on the account groups that apply to this client. Each group you enable adds its related accounts to the Chart of Accounts; anything you leave off stays out.
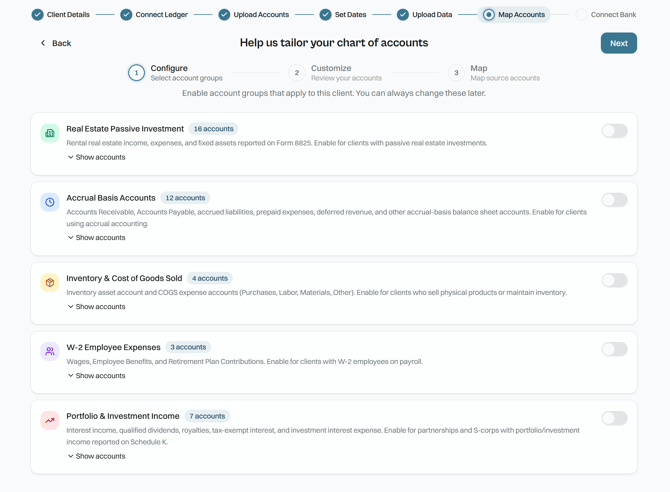
Typical groups include:
- Inventory & COGS — for clients who sell physical product and need Cost of Goods Sold tracking
- Accrual — for clients on accrual-basis bookkeeping (Accounts Receivable, Accounts Payable, Prepaid Expenses, and similar accounts)
- Real Estate — for clients with rental property income and expenses
- W-2 Employees — for clients running payroll
- Portfolio Income — for clients with investment income (interest, dividends, royalties)
Use Show accounts to preview what a group adds before you turn it on. You can change these later, but 💡 worth knowing: once accounts from a group have been used in a transaction or journal entry, you can't disable that group again until those entries are moved or recategorized — so it's faster to get this right up front than to unwind it later.
Step 2: Customize — Review Your Chart of Accounts
On Customize your chart of accounts, you'll see the client's accounts organized by tax-basis category — Assets, Liabilities, Equity, Income, Expenses, and Cost of Goods Sold — instead of traditional GAAP categories. Because it's tax-basis, this structure is already aligned to IRS tax form lines, so there's no year-end conversion needed later.
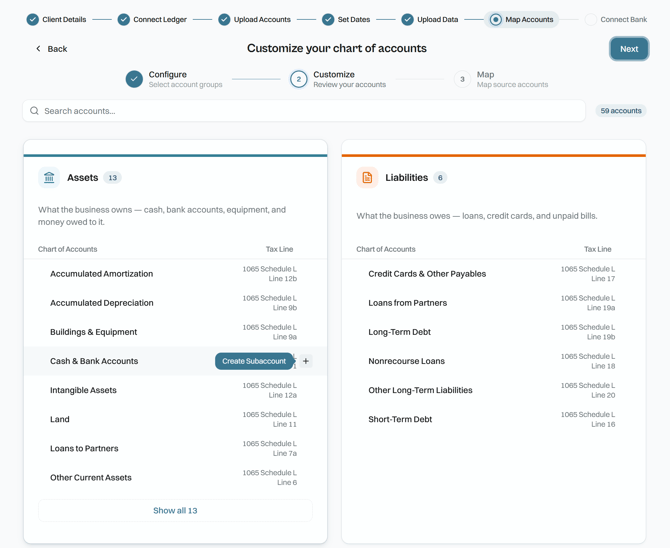
- Click How Your Accounts Map to see how each category flows to the Balance Sheet or Profit & Loss, and which line of the client's tax form it lands on.
- Add any sub-accounts you already know you'll need with Create Subaccount (+ icon in the far right of each account line) — choose the name the Subaccount, and save.
- Keep this step light. It's tempting to fully build out the tree here, but the Mapping step below is where you'll actually decide how much granularity this client needs — see Keep the Chart of Accounts Lean below before you go overboard.
Step 3: Map — Map Your Accounts
This is the step that matters most. Propio's AI automapping runs first, matching each of the client's legacy accounts to Propio's tax-basis accounts. Your job is to review what it proposed and close out two things:
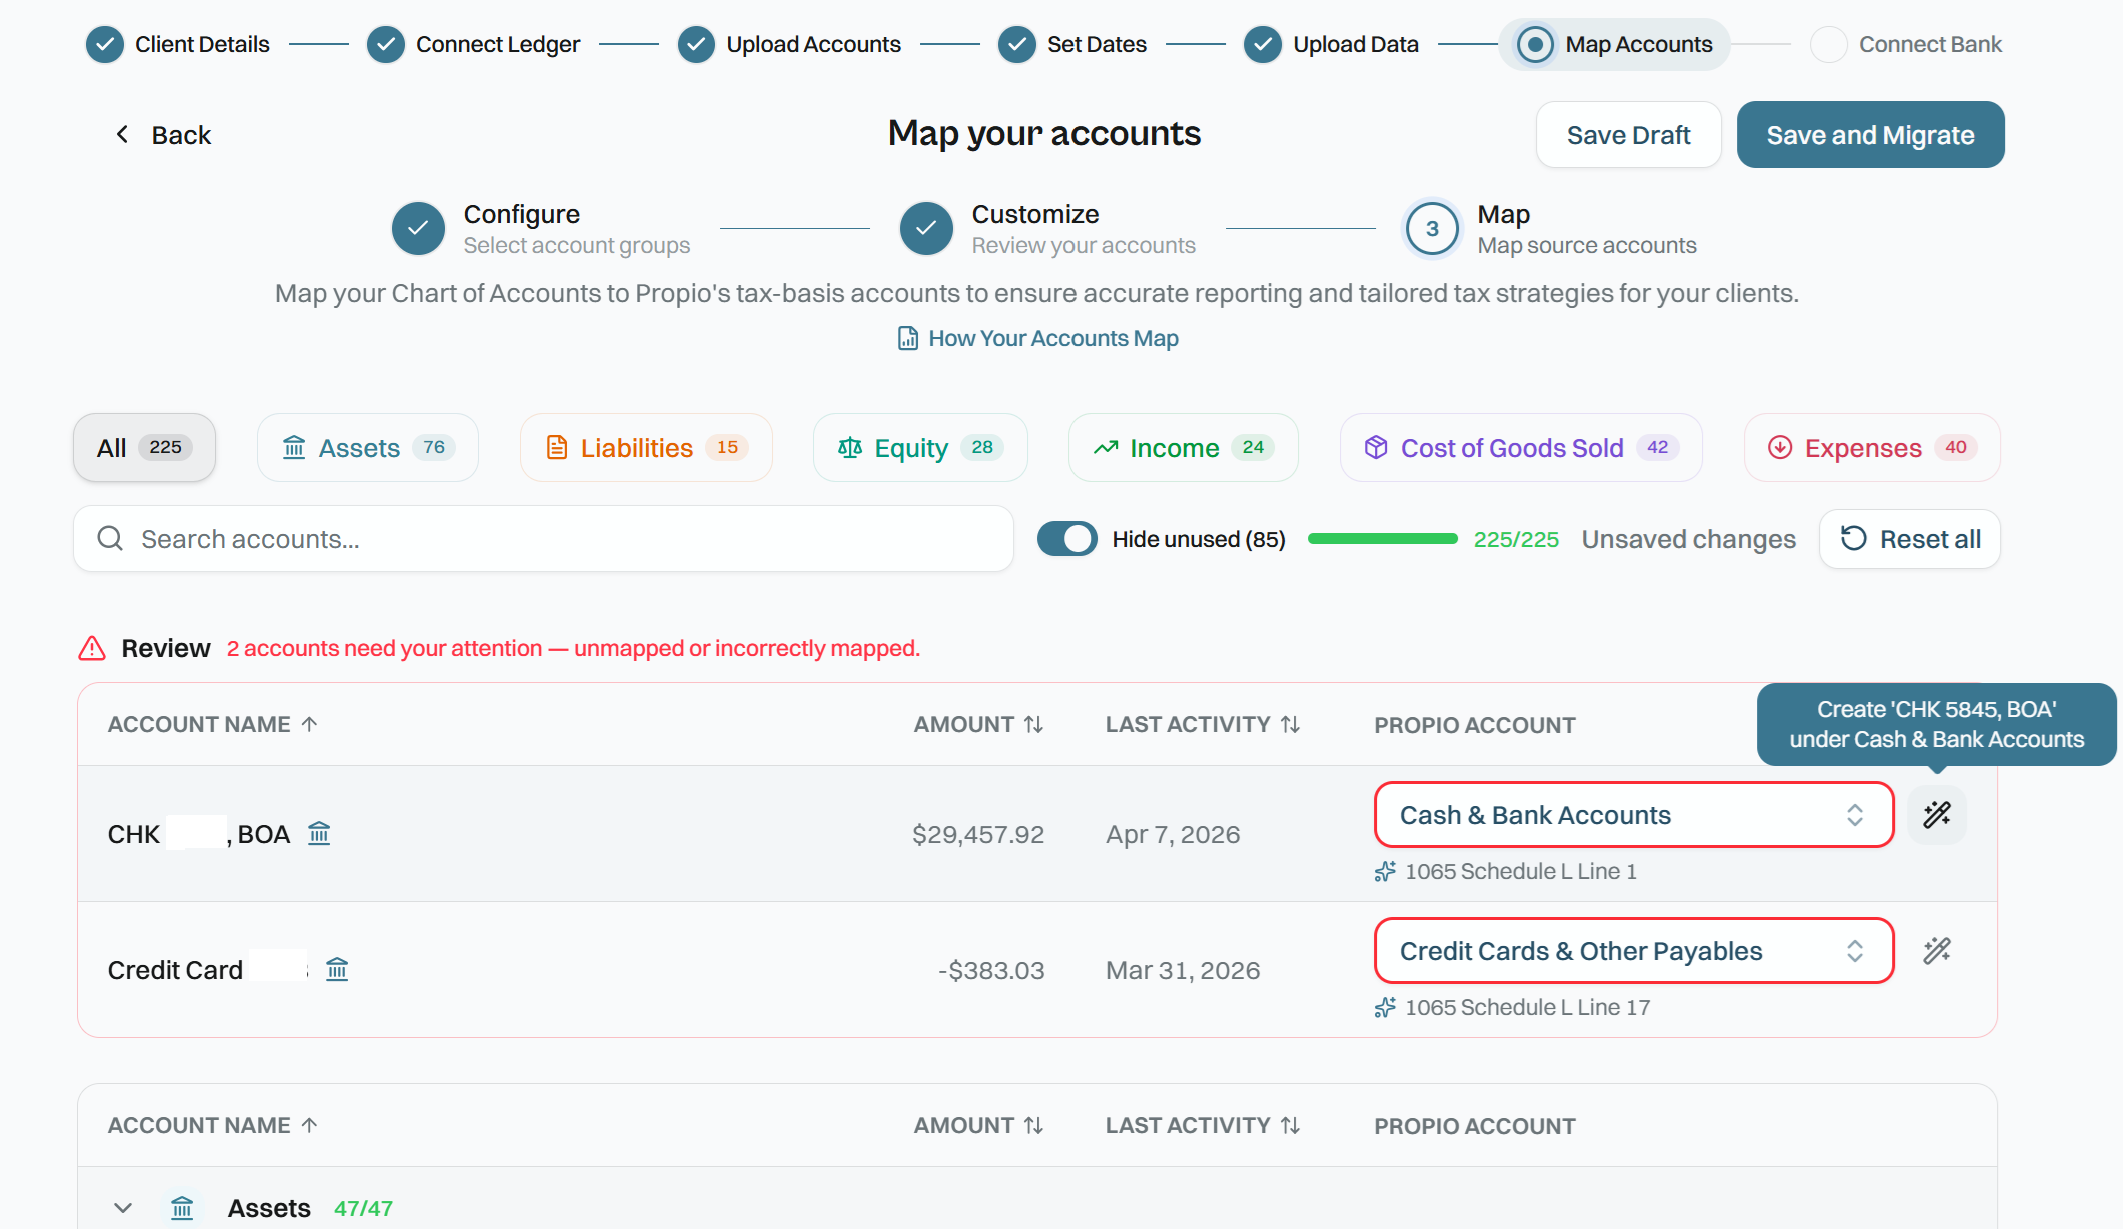
- Create a sub-account for every bank account and credit card. This is mandatory. Propio won't let you map a bank account or credit card to a main (parent) account — if you try, you'll see "Please select a sub-account, not the main account." If the sub-account doesn't exist yet, create it with Add a sub-account right from the mapping screen.
- Review every other proposed mapping and decide: keep the parent account, or create a sub-account? For each legacy account Propio mapped, accept the parent-level mapping it suggested, or add a sub-account if this client genuinely needs that level of detail.
Use Undo to discard unsaved edits, or Revert to AI Suggestions to fall back to Propio's original mapping. Click Save Changes once you're done — you can come back and adjust individual mappings anytime.
⚠️ Don't exit mid-automap. If you close the Map step while AI automapping is still running, Propio will warn you that any progress will be lost. Let it finish, or confirm you're okay restarting.
Keep the Chart of Accounts Lean
Outside of the mandatory bank and credit card sub-accounts, default to the parent-level mapping unless you have a specific, recurring reporting need for more detail. A short, well-organized Chart of Accounts pays off in two ways:
- It sharpens the categorization engine. Every sub-account you add is one more option Propio's AI has to choose between on every transaction. Fewer, well-defined accounts means fewer miscategorizations and less cleanup for you to review.
- It keeps the books easier to run. A P&L with 40 lines tells a business owner a story. A P&L with 400 lines is a spreadsheet they'll never read — and one your team has to maintain.
Tips
💡 Manage detail with Tags and memos, not accounts. Before creating a sub-account just to track who, where, or which project a cost belongs to, reach for Propio's two built-in tools instead:
- Tags are the structured option. After the onboarding, you will be able to create a Tag Group (for example, Location, Project, or Department) and apply a tag from that group to each transaction. Tags aren't just a note — Propio's reports, including the Profit & Loss, and Balance Sheet can be filtered by Tags, so you can pull a location-by-location or project-by-project view on demand without splitting the Chart of Accounts to get it.
- Memos are the lightweight option, for detail you want visible on drill-down but don't need to filter or report on separately — a one-off note like "reimbursed by client" on an otherwise ordinary Travel expense.
Save new sub-accounts for the cases where neither of those fits — where the detail genuinely needs to be its own line in the Chart of Accounts itself (for example, a different tax treatment or a covenant that requires it broken out).
- Restaurant groups tracking spend by location don't need "Rent — Downtown" and "Rent — Uptown" as separate accounts — one Rent account with a Location tag on each transaction keeps the P&L clean while still letting you filter by location whenever you need that view.
- Construction clients tracking costs by job are the same story — one Materials account with a Project tag beats a dozen project-specific material accounts that all go stale the moment the job closes out.
💡 Never repeat an account name across categories. Having a Software Subscriptions account under both Expenses and Cost of Goods Sold (or under two different parent accounts) causes two problems: it breaks automation, since bank feed rules and AI categorization rely on each account being distinct, and it invites human error, since whoever's coding a receipt from a dropdown will grab the first match they see, whether or not it's the right one. If a client's workflow truly needs the split, make the names unmistakably different — not "Software Subscriptions" twice, but "Software — Delivery" and "Software — G&A."